When Should You Replace a Timing Belt? Signs, Mileage, and Risks

A timing belt replacement is needed every 60,000 to 100,000 miles to keep your engine running smoothly. The timing belt connects your engine’s top and bottom halves so valves open at the right time. Replacing this rubber belt before it breaks keeps your engine safe from major damage. Auto repair shops inspect, repair, and maintain vital engine parts for everyday drivers and business fleets. Skilled auto mechanics provide routine maintenance, engine checks, and repairs to help your car last longer.

Key Takeaways

●     Most car makers recommend a timing belt replacement interval of 60,000 to 100,000 miles.

●     A snapped belt causes engine valves to hit pistons, leading to total engine failure.

●     Key timing belt replacement signs include squealing noises, engine misfires, and visible rubber cracks.

●     Replacing a worn belt costs far less than fixing a destroyed engine.


Here are 7 timing belt replacement signs and safety rules that every driver should know.

1. You Have Reached the Maximum Timing Belt Replacement Mileage Interval

Replace your belt as soon as your odometer hits the recommended limit. Most car makers set a strict timing belt replacement mileage limit between 60,000 and 100,000 miles. Rubber gets weak over time, even if you do not drive often. Driving past this limit raises your risk of a sudden breakdown.

2. You Hear a High-Pitched Squealing or Ticking Noise From the Engine

A loud squealing sound means your belt is loose or slipping. The belt rubs against metal pulleys when internal parts wear down. Ticking sounds often mean the rubber teeth on the belt are wearing off. Fixing these noises early prevents total engine failure on the road.

3. Your Engine Misfires or Struggles to Start

A slipping belt ruins the timing of your engine valves. The belt can jump out of place and cause a cylinder to open too soon. This issue causes shaking, rough idling, and weak power. Continued driving with bad timing leads to a complete engine stall.

4. You Notice Oil or Coolant Leaking Near the Front of the Engine

Fluid leaks weaken the rubber material in the belt. Oil or coolant dripping from the front cover softens the rubber teeth. Soft rubber makes the belt slip off its gears easily. Fixing leaks quickly helps your new belt last longer.

5. You See Fraying, Cracking, or Glazing on the Rubber Belt

Looking at the belt often shows wear before it snaps. Small cracks along the rubber show that heat and age have made it weak. Frayed edges show that internal cords are pulling apart. Shiny undersides mean the rubber has lost its grip.

6. Your Car Produces Excess Exhaust Smoke During Acceleration

Bad valve timing makes your engine burn fuel incorrectly. Unburned fuel goes straight into your exhaust, creating dark smoke. This extra fuel puts heavy stress on your catalytic converter. Correct timing restores clean combustion and normal exhaust.

7. Your Vehicle Will Not Turn Over at All

A broken belt stops the top of the engine from turning. You will hear the starter motor spin, but the car will not start. Trying to start a car with a broken belt pushes engine parts together. Stop turning the key right away if you suspect a broken belt.

How Timing Belt Systems Actually Work Under Heat and Pressure?

Engines rely on exact timing to burn fuel safely. A timing belt connects the bottom crankshaft to the top camshaft at speeds over 3,000 revolutions per minute. Automotive research shows engine heat routinely goes above 200 degrees Fahrenheit, which breaks down rubber over time.

Interference engines have tight spaces between valves and moving pistons. According to industry data, over 70 percent of modern cars use interference engine designs to save fuel. If the belt breaks, the top half stops while metal pistons keep moving up and down. This impact bends valves and destroys the engine in seconds.

Maintenance Factor Standard Timing Belt Replacement Interval Severe Driving Conditions
Mileage Limit 60,000 to 100,000 miles 45,000 to 60,000 miles
Time Limit 6 to 7 years 4 to 5 years
Visual Check Every 15,000 miles Every 10,000 miles
Repair Priority Preventative maintenance Emergency fix

Quick Summary of Timing Belt Maintenance Guidelines

  • Replace your belt every 60,000 to 100,000 miles or six years.
  • Watch for warning signs like engine misfires, squeal noises, and oil leaks.
  • Never ignore small rubber cracks during routine oil changes.
  • Fixing a broken engine costs four times more than replacing a worn belt.

FAQs

What are the most common timing belt replacement signs?

The most common timing belt replacement signs include ticking or squealing engine noises, engine misfires, oil leaks, visible rubber cracks, and difficulty starting your car. Inspect your engine right away if these symptoms appear.

How much does a standard timing belt replacement cost?

A standard replacement costs between 300 and 1,000 dollars depending on your car. Labor takes up most of the cost because mechanics must remove several engine parts to reach the belt safely.

Can you drive a car with a damaged timing belt?

You should never drive a car with a damaged timing belt. A worn belt can snap without warning while driving, causing major engine damage and putting your vehicle in danger.

How long does a timing belt replacement service take?

A professional belt replacement takes between three and five hours to complete. Mechanics often replace the water pump at the same time to save you money on future labor fees.

What is the average timing belt replacement interval for most vehicles?

The average timing belt replacement interval ranges from 60,000 to 100,000 miles or roughly six years. Always check your owner’s manual for exact mileage recommendations from your car maker.

Protect Your Engine: Schedule Service with Cruz Automotive

Protect your engine from costly damage by keeping up with routine maintenance schedules. The certified mechanics at Cruz Automotive provide comprehensive inspections, diagnostics, and belt services to keep your vehicle running safely. Contact us today to book your next service appointment and drive with confidence.
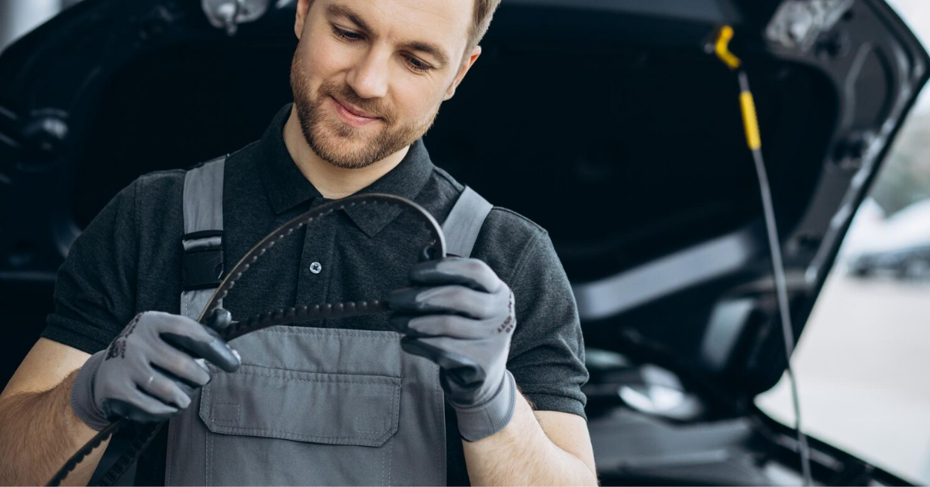
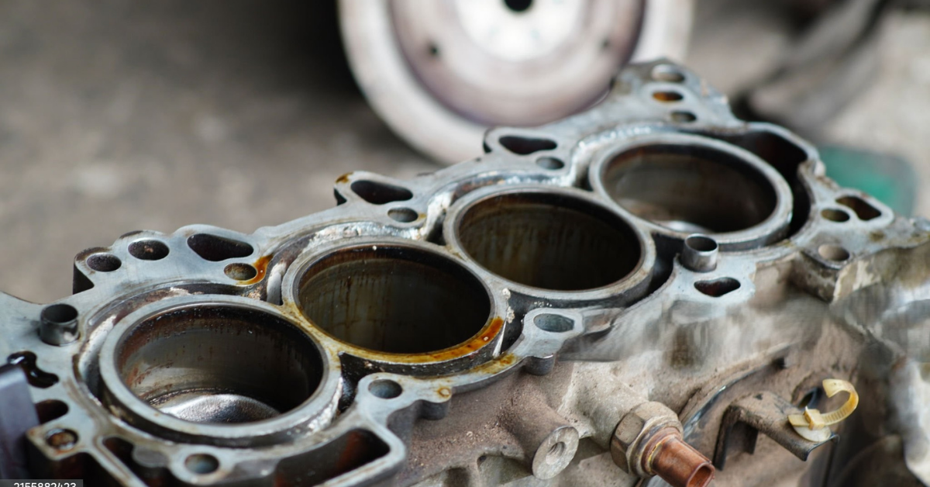
When Should You Replace a Timing Belt? Signs, Mileage, and Risks

Have you ever wondered what keeps your car engine running in perfect rhythm? Underneath your hood lies a hidden rubber belt doing critical work. This component synchronizes your engine parts so your car drives smoothly. Knowing when to replace a timing belt is essential for every vehicle owner. A snapped belt can cause sudden engine breakdown while driving on the highway. Planning a timing belt replacement before it fails saves you thousands of dollars in repairs.

In this guide, we break down replacement schedules, key warning signs, and major failure risks. Understanding these facts helps you protect your car and maintain peace of mind.

What Does a Timing Belt Do in Your Engine?

Your engine contains two main rotating shafts called the crankshaft and the camshaft.

  • The crankshaft moves your pistons up and down inside the engine cylinders.
  • The camshaft opens and closes the engine valves to let air and fuel in.

The timing belt connects these two shafts so they turn in perfect unison. If the belt slips or breaks, the valves open at the wrong time. This ruins engine timing and stops combustion immediately.

When Should You Replace a Timing Belt?

Timing belts do not last forever because they are made of reinforced rubber compounds. Heat, friction, and motor oil gradually break down the rubber material over time.

Recommended Replacement Mileage

Most vehicle manufacturers recommend replacing your belt every 60,000 to 100,000 miles. Check your owner’s manual for the exact interval for your vehicle model. Driving in severe weather or heavy stop-and-go traffic accelerates rubber wear. In these conditions, replacing the belt earlier prevents unexpected breakdowns.

The Time Factor (Age vs Mileage)

Rubber degrades over time even if you do not drive long distances every day. Most auto experts recommend replacing the belt every seven to ten years. If your car sits parked for long periods, the rubber can crack and dry out. Always replace an old belt based on age, even with low mileage.

Recognizing the Signs of a Bad Timing Belt

Unlike other auto parts, timing belts rarely give long warning signs before snapping. However, staying alert to minor changes helps you catch signs of a bad timing belt early.

1. Ticking Noises Under the Hood

A worn belt can produce a distinct ticking sound while your engine runs. This noise occurs when the belt loses tension or teeth begin to strip off. If you hear rhythmic clicking from the front of your engine, inspect the belt quickly. Loose belts can slip off pulleys and cause engine trouble.

2. Engine Misfires and Rough Idling

When a belt stretches, it slips on the camshaft gears and disrupts engine timing. Your engine valves may open or close a fraction of a second too early. This timing error causes engine misfires, rough idling, and poor gas mileage. Your vehicle may also feel sluggish when you step on the gas pedal.

3. Oil Leaks Near the Timing Cover

Motor oil leaking from front engine seals can soak the rubber belt. Oil breaks down rubber compounds rapidly and causes premature belt failure. If you notice oil pooling near your timing belt cover, get your engine inspected. Fixing oil leaks protects your new belt from quick damage.

4. Visual Cracking, Fraying, or Glazing

Mechanics inspect the belt surface during routine engine tune-ups and oil changes. They look for deep cracks, frayed edges, or shiny glazed spots on the rubber. If the belt teeth show severe wear, replacement must happen immediately. A worn belt can snap without further warning.

The Dangerous Risks of Sudden Timing Belt Failure

Understanding what happens during a timing belt failure explains why preventative service matters. The amount of damage depends directly on your engine design.

Interference Engine Risks

In an interference engine, open valves extend into the space where pistons move. The timing belt keeps them from hitting each other. If the belt snaps, the camshaft stops while pistons keep moving up fast. Heavy pistons slam directly into open valves, causing severe engine damage.

This collision bends valves, damages pistons, and destroys the cylinder head. Repairing this destruction often requires a complete engine rebuild.

Non-Interference Engine Risks

In a non-interference engine, pistons and valves never cross into the same physical space. If the belt breaks, parts do not collide. Your car will stop running immediately, leaving you stranded on the road. However, replacing the belt usually fixes the issue without internal metal damage.

Why Mechanics Replace the Water Pump Simultaneously?

When performing a timing belt replacement, mechanics usually recommend replacing the water pump at the same time. The water pump sits directly behind the timing belt on most modern cars. Mechanics must remove the entire belt assembly just to reach the pump.

Installing a new pump during belt service saves you money on future labor costs. It also ensures your cooling system stays reliable for miles ahead.

Timing Belt Replacement Mileage and Risk Summary

Use this scannable reference guide to review maintenance schedules and risks.

Maintenance Metric General Standard Key Risk Factor
Recommended Mileage 60,000 to 100,000 miles Rubber wear and tooth stripping
Time Limit 7 to 10 years Rubber drying, cracking, and rot
Interference Engine Strict replacement schedule Catastrophic engine damage
Associated Parts Water pump, tensioners, pulleys System overheating and belt slippage

How Mechanics Perform a Timing Belt Replacement?

Replacing a belt requires technical skill and precise alignment tools. Here is how professional mechanics complete the job safely.

Step 1: Removing Engine Covers and Drive Belts

Technicians disconnect the battery and remove accessory drive belts. They remove plastic timing covers to access the belt assembly.

Step 2: Aligning Engine Timing Marks

Mechanics turn the engine manually to align factory timing marks on the crankshaft and camshaft gears. Proper alignment prevents timing errors.

Step 3: Replacing Belt, Tensioner, and Water Pump

The technician removes the old tensioner, belt, and water pump. They install a fresh pump, new pulleys, and the new timing belt.

Step 4: Testing Tension and Engine Operation

FAQs

How do I know if my car has a timing belt or timing chain?

Check your vehicle owner’s manual or ask your mechanic. Most older cars and four-cylinder engines use timing belts, while many modern engines use metal chains.

Can you drive with a damaged timing belt?

No, you should never drive with a damaged belt. If it snaps while driving, your engine stops instantly and may suffer total physical destruction.

How long does a timing belt replacement take?

Replacing a belt usually takes 3 to 6 hours of professional labor. Mechanics must remove multiple engine components to access the internal timing cover safely.

Does a broken timing belt damage all engines?

No, broken belts cause severe valve damage mostly in interference engines. Non-interference engines just shut down without bending valves or breaking pistons.

Why is replacing a timing belt so expensive?

The belt itself is inexpensive, but reaching it requires hours of complex labor. Mechanics must disassemble significant front engine parts to complete the service.

Schedule Your Timing Belt Replacement with Cruz Automotive

Preventing timing belt failure is the best way to protect your engine and save money on heavy repairs. If your vehicle is due for service, our team is here to help.

At Cruz Automotive, we provide complete cooling and engine maintenance services. Our skilled mechanics inspect your belt, replace worn components, and install a new water pump with precision. Contact us today to schedule your timing belt replacement and keep your car running safely!

How to Tell If Your Car Has a Blown Head Gasket?

Have you noticed your dashboard temperature gauge climbing fast while driving? An overheating engine can cause instant stress for any driver. It usually points to a serious issue under the hood. One common cause of severe engine trouble is a blown head gasket.

This small seal plays a massive role in keeping your engine running safely. Recognizing the early signs of a blown head gasket helps you avoid costly engine damage. In this guide, we explain how to spot gasket failure early. We break down key symptoms, explain diagnostic tests, and outline what steps to take next.

What Is a Head Gasket and Why Does It Fail?

Your car engine consists of two main metal blocks. The bottom part is the engine block, and the top part is the cylinder head. The head gasket sits right between these two heavy metal components. This gasket acts as a tight barrier. It seals high pressure inside the combustion cylinders during driving. It also keeps engine oil and coolant channels separate so fluids do not mix.

Most head gasket failures happen due to severe engine overheating. When an engine gets too hot, metal components expand beyond normal limits. This heat warps the cylinder head and crushes the gasket seal.

Major Signs of a Blown Head Gasket

We organize head gasket symptoms into distinct categories based on how failure affects your vehicle. Here is how you can tell if your gasket has failed.

1. Fluid Contamination (Oil and Coolant Mixing)

A healthy gasket keeps motor oil and engine coolant completely separate. When the internal seal breaks between these fluid channels, the two liquids blend together.

Pull out your engine dipstick or check under the oil cap. If you see thick, milky oil that looks like chocolate milk, coolant has entered your oil pan. Moisture under the oil cap also signals fluid contamination.

2. Cooling System Failures

A damaged gasket allows hot combustion gases to push into your cooling passages. This extra pressure causes rapid engine overheating even during short trips.

You may also notice a persistent coolant leak with no visible puddles under your car. Coolant disappears because the engine burns it off inside the combustion chamber. You might also see air bubbles rising in your radiator expansion tank.

3. Exhaust Smoke and Combustion Issues

When coolant leaks directly into the combustion cylinders, it burns during engine firing. This process produces thick white smoke coming out of your tailpipe.

This white exhaust smoke often smells sweet, like engine antifreeze. Coolant inside the cylinders also causes engine misfires, rough idling, and sudden loss of acceleration.

4. External Fluid Leaks Along the Engine Seam

Sometimes the gasket breaks outward toward the exterior of the engine block. When this happens, you will notice liquid dripping down the side of the engine.

While an external leak is less common, it still causes low fluid levels over time. Checking along the seam where the cylinder head meets the block helps spot external fluid weeping.

How Do Mechanics Diagnose Head Gasket Damage?

Identifying gasket failure requires careful testing. Here is the four-step diagnostic process we use to confirm gasket damage accurately.

Step 1: Chemical Combustion Leak Test

We place a specialized tester filled with blue fluid on your open radiator neck. If combustion gases enter the cooling system, the blue fluid turns green or yellow.

Step 2: Cooling System Pressure Test

We pump air pressure into your cooling system using a manual pump tool. If the pressure drops quickly without external drips, an internal coolant leak is present.

Step 3: Cylinder Compression Test

We remove spark plugs and thread a pressure gauge into each cylinder port. Low compression readings in two side-by-side cylinders usually indicate a blown seal between them.

Step 4: Spark Plug and Cylinder Inspection

We inspect spark plug tips for white, crusty deposits left by burned coolant. Using a tiny camera tool, we inspect inside cylinders for unusually clean piston tops.

Head Gasket Symptom Breakdown

Use this table to compare common warning signs, root causes, and repair urgency levels.

Warning Sign Internal Cause Repair Urgency Level
Milky Oil on Dipstick Coolant mixing with engine oil Critical: Stop driving immediately
Thick White Exhaust Smoke Coolant burning in combustion chamber Critical: Tow vehicle to shop
Constant Engine Overheating Exhaust gas entering coolant passages High: Do not drive far
Unexplained Coolant Leak Coolant leaking internally or externally High: Check fluid levels now
Bubbling in Radiator Tank Combustion pressure in cooling system High: Inspect cooling system

What Should You Do If You Suspect Head Gasket Failure?

If you notice signs of a blown head gasket, act fast to protect your engine. Driving with a damaged gasket causes warped metal heads and cracked engine blocks. Pull over safely if your temperature gauge climbs into the red zone. Turn off the ignition immediately to let the engine cool down completely. Do not attempt to drive home or push through overheating. Towing your car to a mechanic for a complete head gasket repair saves you from total engine replacement.

FAQs

Can you drive a car with a blown head gasket?

No, you should not drive with a blown head gasket. Driving causes severe engine overheating, warps metal cylinder heads, and can destroy your engine completely.

What causes a head gasket to blow suddenly?

Severe engine overheating is the main cause of head gasket failure. Low coolant levels, failed thermostats, or broken water pumps cause metal parts to warp and crush the seal.

How long does a head gasket repair take?

A standard head gasket repair usually takes 8 to 15 hours of labor. Mechanics must disassemble the top half of the engine, inspect metal surfaces, and install new seals.

Does white exhaust smoke always mean a blown head gasket?

Thick white smoke that smells sweet usually indicates burned coolant from a blown gasket. Thin white vapor on cold mornings is just normal condensation clearing out.

How can you prevent head gasket failure?

Maintain your cooling system regularly to prevent overheating. Flush coolant on schedule, fix minor coolant leaks immediately, and replace failing thermostats or water pumps promptly.

Schedule Your Head Gasket Inspection with Cruz Automotive

Catching head gasket issues early saves your engine from permanent damage. If you notice milky oil, white smoke, or constant engine overheating, our team is ready to help.

At Cruz Automotive, we perform complete cooling system diagnostics and professional head gasket repair services. We pinpoint exact engine issues and restore your vehicle safely. Contact us today to schedule your engine inspection!

What Does an Engine Diagnostic Test Check? A Complete Guide

Seeing a bright light pop up on a car dashboard can make any driver feel nervous. You might worry that the car will break down on the road. Luckily, a car diagnostic test removes the guesswork quickly. It lets us check the computer inside your vehicle.

A full engine diagnostic test inspects key electronic parts across your vehicle. It finds small problems before they cause big mechanical damage. In this guide, we explain what a vehicle diagnostic check looks for and how it keeps your car safe.

How Does an Engine Diagnostic Test Work?

Modern cars are like smart computers on wheels. Every main part connects to a central computer under the hood. This network is an on-board diagnostic system. When a part acts up, the computer creates a warning code. It also turns on your dashboard light.

We plug a tool called an OBD-II scanner into your car. This scanner reads hidden diagnostic trouble codes stored in the car’s memory. These codes guide our mechanics straight to the problem area.

What Systems Does an Engine Diagnostic Test Check?

An engine diagnostic test checks many parts beyond the motor. It scans five main systems across your vehicle.

1. Engine Performance and Ignition Parts

Your engine needs correct timing to run smoothly. The test checks engine performance under normal driving con ditions. It catches cylinder misfires and timing errors early. Misfires waste fuel and make the engine shake. Fixing them quickly protects your engine from serious damage.

2. Exhaust and Emissions Systems

The exhaust system cleans dirty air before it leaves the car. The scanner checks your oxygen sensors and catalytic converter. It also checks for gas vapor leaks. Even a loose gas cap can trigger a check engine light. Fixing exhaust issues keeps your car running clean.

3. Air and Fuel Delivery

Engines need the right mix of air and gasoline to work well. The scan checks fuel injectors, pumps, and air sensors. If an air filter gets dirty, the engine loses power. The test shows us where the flow stops so we can fix it.

4. Transmission Controls

The transmission shifts gears to move your wheels. The diagnostic scan checks fluid temperature and shift speed. It spots transmission slipping early. Catching this problem early saves you from buying expensive replacement parts later.

5. Electrical System

Cars need steady electrical power for all their sensors. The scanner tests battery voltage, the starter, and electrical wires. A weak battery can send false warning codes. Checking the electrical system ensures all computers give true readings.

What an Engine Diagnostic Test Cannot Do

A scan tool does not repair your car by itself. The code shows where the problem is, but not always the exact cause. For example, a bad sensor code might just mean a broken wire. That is why our mechanics perform hands-on testing. We inspect hoses and test wires to make sure we fix the right part.

Diagnostic System Checks at a Glance

System Checked Parts Evaluated Common Warning Signs
Ignition System Spark plugs, timing belt Engine misfires, hard starts
Emissions System Catalytic converter, oxygen sensors Active check engine light, low gas mileage
Fuel & Air System Fuel injectors, airflow sensors Slow acceleration, engine stalling
Transmission Shift solenoids, speed sensors Harsh gear shifts, slipping gears
Electrical System Battery, starter, wiring Dim lights, slow starting

When Should You Get an Engine Diagnostic Test?

You do not need to wait for your car to break down to get help. Watch for small changes while driving every day.

  • Schedule a scan if your check engine light turns on or flashes. A flashing light means you need help right away.
  • Get a test if you hear strange engine noises or lose gas mileage.
  • Request a scan if your car feels slow when you press the gas pedal.

Regular scans help us keep your car running well for a long time.

FAQs

How long does an engine diagnostic test take?

A basic computer scan takes 15 to 30 minutes. Complete testing may take up to an hour so our mechanics can inspect physical parts.

Can I run a diagnostic test myself at home?

You can use a basic scanner to read codes. However, professional tools show real-time data that helps us fix complex problems correctly.

Will a diagnostic test turn off my check engine light?

Clearing a code turns off the light for a short time. We must fix the real mechanical problem to keep the light off for good.

How often should I get a car diagnostic test?

Get a scan whenever a warning light turns on. You can also request a test during yearly maintenance visits.

Can a test find physical engine wear?

Scanners find computer errors and bad electrical parts. Mechanics use hands-on pressure tools to check for physical metal wear inside the engine.

Protect Your Vehicle with Cruz Automotive

A quick engine diagnostic test protects your car and saves you money. Finding small electrical issues early prevents major breakdowns on the road. Our team uses advanced tools to find problems quickly and accurately. At Cruz Automotive, we take pride in keeping your car safe. We explain every repair in simple words, so you always know what your car needs. If your check engine light is on, visit us today for a complete test!